Introduction
As you may know from the official site, SharpDX is a managed wrapper which brings all power of DirectX in .NET world. Currently it is the most feature complete library in its class, supporting majority (if not all) APIs ranging from Direct3D9 and up to Media Foundation and Direct3D11.2, all built for AnyCPU architecture, except Windows Phone 8 platform (due to its limitation). It is open-source under MIT license, so any interested developer is encouraged to explore the source code, reuse any useful approaches and contribute trough pull requests or bug reporting.
This is the first post from SharpDX Tutorials series which describes the general information about SharpDX SDK installation, structure and some information about a typical Toolkit project.
Enough talk, let's get straight to the action.
This is the first post from SharpDX Tutorials series which describes the general information about SharpDX SDK installation, structure and some information about a typical Toolkit project.
Enough talk, let's get straight to the action.
Installation
We will not use the easiest path, but will ensure that we have access to latest and greatest features available. Go to the official site and grab the "Latest Dev Package (2.5.1)" as shown in the following image:

This will download a self-extracting archive - just unpack it in some folder. Be aware that it doesn't create a subfolder - you need to specify it youself, for example "d:\Repositories\SharpDX". For easier reference, you can unpack it in a subfolder in the same folder where you plan to store your projects - this way we will avoid absolute paths and will make the project repository easier to move around, as you will see below.
This will download a self-extracting archive - just unpack it in some folder. Be aware that it doesn't create a subfolder - you need to specify it youself, for example "d:\Repositories\SharpDX". For easier reference, you can unpack it in a subfolder in the same folder where you plan to store your projects - this way we will avoid absolute paths and will make the project repository easier to move around, as you will see below.
Alternative installation methods
Option 1: SharpDX is also available trough NuGet package, but only signed versions (for .NET 2.0, .4.0 and WinRT) because NuGet cannot differentiate same assembly name for different architectures. Therefore, if you want to develop for another platform, the recommended way is to use either SDK installer or the development package.
Option 2: Official installer is the easiest way to install the SDK as it will add all necessary environment variables and will integrate out-of-box with the Visual Studio extension.
Option 3: "Build it yourself" - just clone the official repository, build it and you are ready to go, this method gives the best control over every aspect, but it is more difficult to set up. It will be discussed in a separate post.
Remarks
- Assemblies for .NET2.0 and 4.0 for Direct3D9 should work on Windows XP also.
- On desktop platform, when using DirectX 11, it is required to have installed DirectX June 2010 Redistributable, DirectX SDK is recommended over redistributable to be able to use Direct3D debug layer (creating a device instance in debug mode).
SharpDX SDK structure
So, SDK is downloaded and unpacked - let's check what is inside. In the root folder, we are interested in the following items:
- Bin - here are binaries for various platforms and configurations;
- Samples - here are all available samples, demonstrating usage of SharpDX API, the non-Toolkit samples should not be used as example of good architecture - as they were written as a proof that API works correctly;
- SharpDX.targets - this file implements all the magic of wiring correct SharpDX dlls for the project platform as we will see further in this post.
Let's see what platforms are supported in the "Bin" folder:
- DirectX11-net20 - AnyCPU binaries for .NET 2.0+ on Desktop platform (by "Desktop" I mean all PC platforms starting from Windows Vista and up).
- DirectX11-net40 - same as above, built for .NET 4.0 and up.
- DirectX11-Signed-net20 - AnyCPU, .NET 2.0 version, signed with a private key.
- DirectX11-Signed-net40 - Same as above, for .NET 4.0.
- DirectX11_1-wp8-ARM - Binaries for Windows Phone 8 for ARM CPU - to be used on real devices.
- DirectX11_1-wp8-x86 - Binaries for Windows Phone 8 for x86 CPU - to be used on WP8 emulator.
- DirectX11_2-net40 - AnyCPU binaries for .NET 4.0 which include all DirectX 11, 11.1 and 11.2 functionality. The DirectX 11.1 is available only on Windows 8 and DirectX 11.2 is available only on Windows 8.1, however these binaries can be used in Windows Vista or 7 as long as there are used only APIs which are supported on current operating system.
- DirectX11_2-Signed-net40 - Same as above, signed with a private key.
- DirectX11_2-winrt - AnyCPU binaries for Windows Store Apps, include DirectX11.2 support with same conditions as for desktop platform.
- DirectX11_2-Signed-winrt - Same as above, signed with a private key.
Project structure
Let's create our first SharpDX Toolkit project!Open Visual Studio and create a new WinForms project as shown in the image below:

For easier reference, I have created the project near the unpacked SharpDX SDK, so that the project has the path "D:\Repositories\SharpDXTutorial\SharpDXTutorial1\" and the SDK is in "D:\Repositories\SharpDX\", as mentioned at the end of "Installation" section in this post.
Now, when the project is created, we need to reference the SharpDX assemblies. For fine-grained control I recommend to reference every needed assembly manually, but as we didn't decided yet which features we need - we will just reference all Toolkit assemblies at once, and for this we will perform a small trick. In Visual Studio, right-click the "SharpDXTutorial1" project in Solution Explorer, then select "Unload Project" from the context menu. Right-click it again and select "Edit SharpDXTutorial1.csproj" to edit the project file manually.
Scroll down, to the end of the csproj file, and add the following code after the last "<Import/>" node:
<Import Project="..\..\SharpDX\SharpDX.targets" />
After this, the end of the csproj file should look like this:
  <ItemGroup>
    <None Include="App.config" />
  </ItemGroup>
  <Import Project="$(MSBuildToolsPath)\Microsoft.CSharp.targets" />
  <Import Project="..\..\SharpDX\SharpDX.targets" />
  <!-- To modify your build process, add your task inside one of the targets below and uncomment it.
       Other similar extension points exist, see Microsoft.Common.targets.
  <Target Name="BeforeBuild">
  </Target>
  <Target Name="AfterBuild">
  </Target>
  -->
</Project>
If your folder structure is different - adjust the path accordingly. Save the project file, close its editor and reload the project in Solution Explorer. Now let's check the project references:
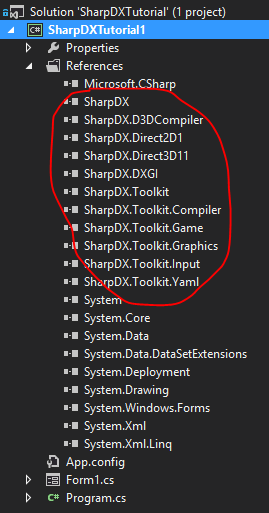
Tadam! Everything is automagically referenced. The included file will detect current project type and automatically reference correct assemblies - this works in the same way for all platforms.
But what if we want to use DirectX 11.2 on Desktop platform? By default are referenced assemblies for DirectX 11. The solution is simple - let's edit the csproj file again!
This time, add "<SharpDXDirectXVersion>DirectX11_2</SharpDXDirectXVersion>" in the first "PropertyGroup" node so it looks like this:
  <PropertyGroup>
    <Configuration Condition=" '$(Configuration)' == '' ">Debug</Configuration>
    <Platform Condition=" '$(Platform)' == '' ">AnyCPU</Platform>
    <ProjectGuid>{76861B07-DF36-4A49-9982-517412D5A420}</ProjectGuid>
    <OutputType>WinExe</OutputType>
    <AppDesignerFolder>Properties</AppDesignerFolder>
    <RootNamespace>SharpDXTutorial1</RootNamespace>
    <AssemblyName>SharpDXTutorial1</AssemblyName>
    <TargetFrameworkVersion>v4.5.1</TargetFrameworkVersion>
    <FileAlignment>512</FileAlignment>
    <SharpDXDirectXVersion>DirectX11_2</SharpDXDirectXVersion>
  </PropertyGroup>
Save and reload the csproj file and check that SharpDX assemblies are referenced from a folder like "D:\Repositories\SharpDX\Bin\DirectX11_2-net40\".
As we have already set up all references, it's time to display something! At least an empty window, to be exact.
From solution explorer delete the Form1.cs as we don't need it and add a new class for the game. Let's call it "MyGame":
namespace SharpDXTutorial1
{
    using SharpDX;
    using SharpDX.Toolkit;

    internal sealed class MyGame : Game
    {
        private readonly GraphicsDeviceManager _graphicsDeviceManager;

        public MyGame()
        {
            _graphicsDeviceManager = new GraphicsDeviceManager(this);
        }

        protected override void Draw(GameTime gameTime)
        {
            GraphicsDevice.Clear(Color.CornflowerBlue);

            base.Draw(gameTime);
        }
    }
}
After this, modify the "Program.cs" file to look like this:
namespace SharpDXTutorial1
{
    using System;

    static class Program
    {
        [STAThread]
        static void Main()
        {
            using (var game = new MyGame())
                game.Run();
        }
    }
}
Now, compile and run the project - it should display a window with a blue background. Currently it is empty, but in next tutorials we will add some content to it. Developers with XNA background may notice that the general structure of the game class is the same as in XNA, but in this case we have access to all power of DirectX11.2, including Tiling Resources and Shader Linking.
Alternative way of creating a project
A quicker way to create a SharpDX project is to use the SharpDX Toolkit for Visual Studio extension - it references all assemblies exactly in the same way as described above, however it does all the setup automatically and relies on "SharpDXSdkDir" environment variable to find the path to SDK installation. This variable is set when SharpDX SDK is set up using the official installer - but we didn't use this method because we installed it from a self-extracting archive (we want all latest features, remember?).An additional benefit of using this extension is that it creates a basic class for the game and, optionally, all needed functionality - sprite batch, model rendering, input, etc.
Conclusion
Today technologies evolve at extremely fast rates and any good developer should keep learning and exploring new stuff. Feel free to explore the available Toolkit samples, source code on github and class interfaces (even the Object Browser window from Visual Studio can be a good source of knowledge).As you can see - there is nothing difficult in setting up a basic project, even when doing all this manually. I hope this tutorial will be useful.
hey good contribution, keep going.
ReplyDeleteThank you.
DeleteThanks, really helped me get started
ReplyDeleteThis is excellent, Thank you for the tutorial.
ReplyDeleteI see this is tutorial #1; If you do another, could you go into how to properly implement Game and its components in an object oriented fashion? It seems like there are many ways to go about it and I feel the way I am doing it is not quite best practice. None of the samples I have seen leverage Game's features enough to learn best practice.
ReplyDeleteThe second tutorial is under development and will focus exactly on Game implementation. In few words, in SharpDX Toolkit you can apply same components structure as in XNA, but you may want to scale it according to available time and resources.
DeleteHow to go to the next tutorial?
ReplyDeleteSorry, the next tutorial is not ready yet.
DeleteHi, You can show how to load an image from hdd and render it on the form or another winform control?
ReplyDeleteregards
Uh oh, these tutorials are discontinued as SharpDX Toolkit subset has been deprecated and will not be developed anymore.
DeleteFor your problem, you may want to have a look at Direct2D samples like this one: https://github.com/sharpdx/SharpDX-Samples/blob/master/Desktop/Direct2D1/BitmapApp/Program.cs
Could you reccommend an alternative?
Delete@Bhe Peh 9K, you can try Unity or Xenko as a game engine.
Delete